No edit summary Tag: sourceedit |
m (added link for resource base) |
||
| (24 intermediate revisions by 10 users not shown) | |||
| Line 1: | Line 1: | ||
{{Protection}} __NOTOC____NOEDITSECTION__ |
{{Protection}} __NOTOC____NOEDITSECTION__ |
||
| − | [[File: |
+ | [[File:ShockLauncher8.png|center|250px|link=]] |
{{Quote|The Shock Launcher fires shock bombs, similar to those in your Gunboat's arsenal. Enemy troops caught in the area of effect are briefly stunned and unable to move or attack.}} |
{{Quote|The Shock Launcher fires shock bombs, similar to those in your Gunboat's arsenal. Enemy troops caught in the area of effect are briefly stunned and unable to move or attack.}} |
||
| Line 18: | Line 18: | ||
| Level 4 |
| Level 4 |
||
|- |
|- |
||
| − | | [[File:Shock_launcher_level5.png|center| |
+ | | [[File:Shock_launcher_level5.png|center|130px|link=]] |
| − | | [[File:ShockLauncher6.png|center| |
+ | | [[File:ShockLauncher6.png|center|130px|link=]] |
| − | | [[File: |
+ | | [[File:ShockLauncher7.png|center|120px|link=]] |
| − | | [[File: |
+ | | [[File:ShockLauncher8.png|center|135px|link=]] |
|- |
|- |
||
| Level 5 |
| Level 5 |
||
| Line 32: | Line 32: | ||
==Summary== |
==Summary== |
||
* The Shock Launcher is unlocked at [[Headquarters]] level 17 and is the final [[Defensive Buildings|Defensive Building]] to be unlocked. |
* The Shock Launcher is unlocked at [[Headquarters]] level 17 and is the final [[Defensive Buildings|Defensive Building]] to be unlocked. |
||
| − | * The Shock Launcher can immobilize [[Troops]] as well as damage them. |
+ | * The Shock Launcher fires [[Shock Bomb]]s over a long range that can immobilize [[Troops]] in a wide area as well as deal minor damage to them. |
| + | * Like the [[Mortar]], [[Rocket Launcher]], and [[Machine Gun]], it has a blind spot and cannot target troops right next to it. |
||
==Offensive Strategy== |
==Offensive Strategy== |
||
| Line 39: | Line 40: | ||
*A Shock Launcher firing at you for a long period of time while you are using a [[Tank]] strategy can be a problem. [[Tank]]s are already slow and a Shock Launcher stopping them every few seconds will make them even slower, which may cause you to run out of time in an attack. |
*A Shock Launcher firing at you for a long period of time while you are using a [[Tank]] strategy can be a problem. [[Tank]]s are already slow and a Shock Launcher stopping them every few seconds will make them even slower, which may cause you to run out of time in an attack. |
||
*[[Heavy]]-[[Zooka]] is typically the strongest composition against Shock Launchers because the damage dealing troops, the [[Zooka]]s are safe behind high health troops, the [[Heavy|Heavies]]. |
*[[Heavy]]-[[Zooka]] is typically the strongest composition against Shock Launchers because the damage dealing troops, the [[Zooka]]s are safe behind high health troops, the [[Heavy|Heavies]]. |
||
| + | *While Heavies are capable of protecting Zookas from Shock Launchers' shots, [[Riflemen]] are incapable of protecting Zookas in the same case as the splash radius is sufficient to hit both Riflemen and Zookas at the same time. Hence when using such a strategy, it is highly recommended to keep the Shock Launcher [[Shock Bomb|shocked]] or destroy it before the battle starts. |
||
==Defensive Strategy== |
==Defensive Strategy== |
||
| − | *Shock Launchers are most effective at immobilizing [[Warrior]]s that are attacking your [[Headquarters]]. It will hinder a great number of them from dealing damage to the [[Headquarters]] in that crucial time. Make sure your Shock Launchers are within range of the [[Headquarters]]. |
+ | *Shock Launchers are most effective at immobilizing [[Warrior]]s that are attacking your [[Headquarters]]. It will hinder a great number of them from dealing damage to the [[Headquarters]] in that crucial time. Make sure your Shock Launchers are within range of the [[Headquarters]]. They are also good at making [[Tank]]s useless, as Tanks have a slow fire rate and the shocks will decrease their effectiveness. |
*Try to place them away from your [[Flamethrower]]s that are near the [[Headquarters]] because these two [[Defensive Buildings|defenses]] are the best ones for stopping [[Warrior]]s, and you do not want to make it easy for attackers to [[Shock Bomb]] them all. |
*Try to place them away from your [[Flamethrower]]s that are near the [[Headquarters]] because these two [[Defensive Buildings|defenses]] are the best ones for stopping [[Warrior]]s, and you do not want to make it easy for attackers to [[Shock Bomb]] them all. |
||
*Try to place them where it covers as many of your other [[Defensive Buildings]] as possible so that it can slow down other approaching [[Troops]]. |
*Try to place them where it covers as many of your other [[Defensive Buildings]] as possible so that it can slow down other approaching [[Troops]]. |
||
| Line 58: | Line 60: | ||
==Trivia== |
==Trivia== |
||
| − | * |
+ | *Building Health, Defensive Building Damage [[Statue]]s and [[Damage Amplifier]]s will not increase the stun time of the Shock Launcher. Its stun time can only be increased by upgrading it. However, Defensive Building Damage statues will increase the damage each shock does to troops. |
*While the Shock Launcher can damage and kill weak troops like [[Zooka]]s, the player's gunboat [[Shock Bomb]] cannot. |
*While the Shock Launcher can damage and kill weak troops like [[Zooka]]s, the player's gunboat [[Shock Bomb]] cannot. |
||
* The Shock Launcher is the defensive structure with the highest amount of health at max level you can build, excluding [[:Category:Prototype Defenses|Prototype Defenses]]. |
* The Shock Launcher is the defensive structure with the highest amount of health at max level you can build, excluding [[:Category:Prototype Defenses|Prototype Defenses]]. |
||
| + | * The Shock Launcher is the only normal defense that cannot be located in a [[Resource Base]]. |
||
| + | * Strangely, a Shock Mine is capable of shocking longer than a Shock Launcher. The Shock Mine's shock time is 6 seconds at level 1, while a Shock Launcher's shock time is 3.1 seconds at Max level. |
||
| + | ** This may occur because Shock Mines can only be used once per battle, while Shock Launchers can be used until the battle ends or it is destroyed. |
||
<center> |
<center> |
||
Revision as of 15:41, 12 April 2018
 |
 |
 |
 |
| Level 1 | Level 2 | Level 3 | Level 4 |
 |
 |
 |
 |
| Level 5 | Level 6 | Level 7 | Level 8-10 |
Summary
- The Shock Launcher is unlocked at Headquarters level 17 and is the final Defensive Building to be unlocked.
- The Shock Launcher fires Shock Bombs over a long range that can immobilize Troops in a wide area as well as deal minor damage to them.
- Like the Mortar, Rocket Launcher, and Machine Gun, it has a blind spot and cannot target troops right next to it.
Offensive Strategy
- Shock Launchers are a threat to any troop composition because they will immobilize your Troops which gives other defenses more time to take them out, so it may be best to destroy Shock Launchers with Barrage or Artillery before landing your Troops.
- When using Smokey Warriors, however, it is probably best to Shock Bomb them along with other defenses while your Warriors are attacking the Headquarters. The Smoke Screens will protect them while they are running to the Headquarters.
- A Shock Launcher firing at you for a long period of time while you are using a Tank strategy can be a problem. Tanks are already slow and a Shock Launcher stopping them every few seconds will make them even slower, which may cause you to run out of time in an attack.
- Heavy-Zooka is typically the strongest composition against Shock Launchers because the damage dealing troops, the Zookas are safe behind high health troops, the Heavies.
- While Heavies are capable of protecting Zookas from Shock Launchers' shots, Riflemen are incapable of protecting Zookas in the same case as the splash radius is sufficient to hit both Riflemen and Zookas at the same time. Hence when using such a strategy, it is highly recommended to keep the Shock Launcher shocked or destroy it before the battle starts.
Defensive Strategy
- Shock Launchers are most effective at immobilizing Warriors that are attacking your Headquarters. It will hinder a great number of them from dealing damage to the Headquarters in that crucial time. Make sure your Shock Launchers are within range of the Headquarters. They are also good at making Tanks useless, as Tanks have a slow fire rate and the shocks will decrease their effectiveness.
- Try to place them away from your Flamethrowers that are near the Headquarters because these two defenses are the best ones for stopping Warriors, and you do not want to make it easy for attackers to Shock Bomb them all.
- Try to place them where it covers as many of your other Defensive Buildings as possible so that it can slow down other approaching Troops.
- Like the Flamethrower, it is great when placed between the HQ and the edge of the island; Warrior attackers that flare directly to the HQ will not be able to shock the Shock Launcher without shocking a large portion of their Warriors.
- Two Shock Launchers whose shock durations total to at least 5 seconds can immobilize troops indefinitely if they fire at a staggered rate with correct timing. Take advantage of this by placing Shock Launchers strategically.
Upgrade Differences
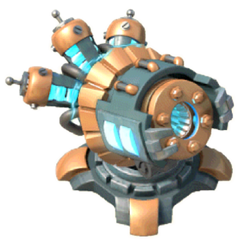
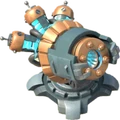
- Initially, the Shock Launcher is a gray structure with a small metal base, and a short barrel. There is a thin bronze ring at the end of the barrel, and a larger, engraved one surrounding the barrel. It has a circular base.
- At level 2, the Shock Launcher gains a single tesla coil at the back.
- At level 3, a second coil is added to the Shock Launcher. The base is now reinforced, being hexagonal with a wire laid across it.
- At level 4, a third coil is added in between the existing coils.
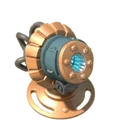
- At level 5, two glowing lights are added to the base of the Shock Launcher.
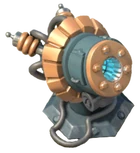
- At level 6, the tesla coils turn light blue, and sparks can be seen running on the coils.
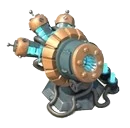
- At level 7, the wire and glowing lights are removed and the base is reinforced. The Shock Launcher's top and sides are also reinforced.
- At level 8, the sides now gain light blue panels that glow. The base also gains beige highlights.
Trivia
- Building Health, Defensive Building Damage Statues and Damage Amplifiers will not increase the stun time of the Shock Launcher. Its stun time can only be increased by upgrading it. However, Defensive Building Damage statues will increase the damage each shock does to troops.
- While the Shock Launcher can damage and kill weak troops like Zookas, the player's gunboat Shock Bomb cannot.
- The Shock Launcher is the defensive structure with the highest amount of health at max level you can build, excluding Prototype Defenses.
- The Shock Launcher is the only normal defense that cannot be located in a Resource Base.
- Strangely, a Shock Mine is capable of shocking longer than a Shock Launcher. The Shock Mine's shock time is 6 seconds at level 1, while a Shock Launcher's shock time is 3.1 seconds at Max level.
- This may occur because Shock Mines can only be used once per battle, while Shock Launchers can be used until the battle ends or it is destroyed.
Statistics
| HQ Level | 1 | 2 | 3 | 4 | 5 | 6 | 7 | 8 | 9 | 10 | 11 | 12 | 13 | 14 | 15 | 16 | 17 | 18 | 19 | 20 | 21 | 22 | 23 | 24 | 25 |
|---|---|---|---|---|---|---|---|---|---|---|---|---|---|---|---|---|---|---|---|---|---|---|---|---|---|
| Number Available | 0 | 0 | 0 | 0 | 0 | 0 | 0 | 0 | 0 | 0 | 0 | 0 | 0 | 0 | 0 | 0 | 1 | 1 | 1 | 2 | 2 | 2 | 2 | 2 | 2 |
| Building Size |
Range |
Attack Speed |
Damage Type |
Splash Radius |
Special Ability |
|---|---|---|---|---|---|
| 3x3 | 4-18 | 5 Seconds | Splash | 3 Tiles | Immobilizes Troops |
| Level |
Hitpoints |
Damage Per Second |
Damage Per Shot |
Shock Duration |
Upgrade Cost | Upgrade Time |
Instant |
HQ Level Required |
XP Gain | ||
|---|---|---|---|---|---|---|---|---|---|---|---|
| Wood |
Stone |
Iron | |||||||||
| 1 | 7,000 | 12 | 60 | 1.4s | 810,000 | 670,000 | 420,000 | 8h | 1,747 | 17 | 18 |
| 2 | 7,700 | 13 | 65 | 1.6s | 940,000 | 780,000 | 490,000 | 10h | 1,951 | 17 | 20 |
| 3 | 8,470 | 14 | 70 | 1.8s | 1,150,000 | 1,050,000 | 690,000 | 12h | 2,358 | 18 | 22 |
| 4 | 9,300 | 15 | 75 | 2.0s | 1,480,000 | 1,350,000 | 890,000 | 14h | 2,812 | 18 | 24 |
| 5 | 10,200 | 17 | 85 | 2.2s | 1,670,000 | 1,620,000 | 1,270,000 | 18h | 3,279 | 19 | 25 |
| 6 | 11,300 | 19 | 95 | 2.4s | 2,040,000 | 1,980,000 | 1,560,000 | 20h | 3,780 | 19 | 28 |
| 7 | 12,400 | 21 | 105 | 2.6s | 2,470,000 | 2,470,000 | 2,460,000 | 1d | 4,627 | 20 | 32 |
| 8 | 13,600 | 23 | 115 | 2.8s | 2,880,000 | 2,880,000 | 2,870,000 | 1d 6h | 5,203 | 20 | 36 |
| 9 | 15,000 | 25 | 125 | 3.0s | 3,300,000 | 3,300,000 | 3,300,000 | 1d 12h | 5,774 | 20 | 37 |
| 10 | 16,500 | 28 | 140 | 3.1s | 4,320,000 | 4,700,000 | 5,080,000 | 1d 14h | 7,384 | 21 | 39 |