Introduction
The Rifle-Warrior-Medic strategy is one of the weakest Boom Beach strategies. This relies on the Warriors to tank the damage, Riflemen to deal the damage, and the Medics to heal. The strategy is ineffective in regular bases, but it is effective on Warships. Below, the Rifle-Warrior-Medic strategy will be covered in detail.
The Troops
Riflemen

The Riflemen are the main troop in this composition. Their specialty does not lie in soaking up hits. Instead, they are good at swarming a warship. Their small size of 1 space means they will always fill a landing craft no matter the level. A level 22 rifleman has 580 HP and deals 157 damage per shot. Damage is somewhat low-moderate per unit, but their large numbers make up for this. Similarly, their health isn't outstanding, but it is compensated with the sheer amount of them. The Rifleman's low health and large numbers means that they are extremely vulnerable to splash damage. Most of the defenses deal this, in fact, only 3 do not do this: both Cannon types and the Sniper Tower. This leaves 7 types of defenses that excel at getting rid of them. Generally, the amount of these defenses increases at the higher levels, so they aren't too bad in the low stages. Riflemen are capable at handling a warship alone, but an increase in damage allows them to perform more effectively. This task belongs to the Warrior.
Warrior
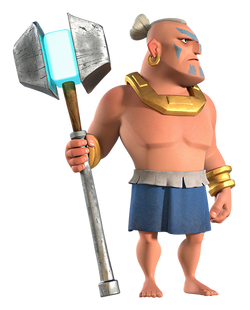
The Warrior is the second main troop in this strategy. Warriors use melee attacks rather than guns and have relatively high damage. Warriors have the fastest movement speed out of all troops. The Warrior's health is higher than a Rifleman's and can also heal himself through attacking making him very useful. They can handle any Warship themselves but an extra healing support makes them perform even better. This job belongs to the Medic.
Medic

The Medic is the 3rd and final troop for this army The Medic is the only troop that does not deal damage. In exchange, they are the only source of healing, aside from Medkits. Their "damage" is fairly impressive. Medics can heal a maximum of 32 Health Per Second. Health is moderate; max level Medics have 1,376 HP. This allows them to be killed quickly by most defenses, but their location behind other troops generally prevents this. Range is rather short, although it is good enough to allow them to stay safe behind other troops. Rate of fire is fast, at 1 second between "shots". This allows them to heal other troops quickly. It is also splash, letting multiple troops to be healed at once. An important handling note is that they do not follow Flares. Instead, they follow injured troops and if none are hurt, they'll follow the closest one. This makes them near uncontrollable because they tend to move very erratically, although it is still manageable. Of course, Medics require more conventional troops to be successful. When paired with the right units, they can be almost unstoppable.
Hero of Choice: Dr. Kavan

My hero of choice I would suggest using is Dr. Kavan because his Hero Perk is Galvanizing Presence, which reduces incoming damage of troops he heals for a short period of time. Use the Second Wind ability to revive Warriors, Medics and Riflemen. Likewise, the Second Wind ability can also summon extra Riflemen as support. This would be beneficial, especially if your army includes Riflemen.
How to handle defenses
There is a way to handle defenses when using the RWM strategy. The top one means that it shall be focused first.
Shock Launchers-- Extreme- These defenses is the biggest threat against the Rifle-Warrior-Medic strategy. They can stop large groups of troops, allowing other troops to walk past them which would result in them being killed. Low to medium leveled Shock Launchers are not problematic, but are still considered a threat. Destroy these at all costs.
Rocket Launchers-- Extreme- These turrets are effective against killing groups of Riflemen and Warriors, but they can be healed by Medics. Warriors are not problematic as they can reach their blind spots easily. Groups of these turrets are problematic, but they can be destroyed by using Flares, Shock Bombs, and Medkits. In general, destroy them at all costs, no matter what the level is.
Boom Mines-- Extreme- They are the traps that can deal massive damage to Riflemen, Warriors, and Medics. When a few Boom Mines are there, it is easy to avoid, but when there are large groups on your way, it can be very dangerous. It is one of the most powerful defenses that can deal heavy damage in one strike. Although they are more dangerous for Riflemen and Warriors, a lucky explosion can kill some Medics too.
Boom Cannons-- Hard- These turrets can kill your troops, but because they are single-target turrets, they can be destroyed quickly by large groups of Warriors and Riflemen. Groups of these turrets can be problematic but they can be stopped by using Flares and Shock Bombs. Consider destroying them or using Shock Bombs and Flares on them.
Cannons-- Hard- High-leveled Cannons can kill your troops, but low to medium-leveled Cannons are not problematic. In fact, they can be swarmed by large groups of Warriors and Riflemen. Groups of Cannons can be problematic (unless you use Flares, Shock Bombs, and Medkits to support your troops).
Shock Mines-- Hard- Shock Mines are also effective against the Rifle-Warrior-Medic Strategy because they will stop troops in its area of effect which makes them unable to move or attack. They deal minor damage in its area of effect. When there are a few Shock Mines, it can be avoided easily, but large groups can be dangerous because if some troops get caught in the area of effect, other troops can walk past them, which results in many defenses killing them.
Sniper Towers-- Medium- Sniper Towers deal medium damage to troops, meaning if any Warriors or Riflemen get hit by them, the Medics can out-heal the damage. Groups of high leveled Sniper Towers can be problematic (unless if you use Flares, Shock Bombs, and Medkits to support your troops), but low-medium leveled Sniper Towers are not problematic.
Mortars-- Medium- Mortars have high damage and splash damage, making them effective in killing groups of Riflemen. Warriors can destroy them quickly by entering their blind spots. It has a slow firing rate, which means troops can avoid their shots. Low level ones have an almost negligible effect. Even if it is high level, it can only attack one "chunk" of troops at a time. The slow rate of fire means that it can be swarmed somewhat easily. Groups, on the other hand, are more of a problem. Mortars should be taken out ASAP, but a Shock Bomb and Flare will allow the troops to destroy them quickly.
Mines-- Medium- Small groups of mines are not problematic but large groups can be troublesome. The good news is that they are only used once, meaning that if the damage isn't lethal and is out-healed, it won't have much effect. Large clusters should be destroyed with a Barrage or avoided altogether.
Machine Guns-- Easy- This defense also has splash damage, making it able to damage multiple troops at once. The damage per shot is average, and with a high rate of fire, can make a devastating volume of fire. However, it is not 100% accurate and Riflemen and Warriors can swarm and destroy it easily. These can still be a problem, but can be out-healed by Medics easily. This defense should only be considered a threat when Medics and Medkits are not used. Otherwise, they are fairly simple to take down without too many problems.
Flamethrowers-- Easy- This defense can overpower Riflemen and Warriors. Low to medium-leveled Flamethrowers are not problematic, but groups of high leveled Flamethrowers can be problematic. Medkits and Medics have a similar effect, but multiple should counter the damage of mid level Flamethrowers. Because of its short range, players can flare around out of its range or destroy them with the help of Shock Bombs, Medkits, and Flares, rendering these defenses useless and ineffective.
Prototype defenses- varies; A few prototype turrets are not problematic but many of them can be problematic. It depends on what prototype turrets are there on the Warship battlefield. Some can be out-healed easily while others cannot be out-healed. Support your troops with Flares, Shock Bombs, Smoke Screens, and Medkits if needed. Sometimes, it is best to destroy as many of them as possible at the start of a battle before deploying your troops if you need to leave some standing.
How to attack
- Begin by destroying as many Shock Launchers, Rocket Launchers, and large clusters of mines if you need to leave one standing.
- Deploy your troops and Dr. Kavan.
- Throw Shock Bombs on splash damage defenses to prevent your Riflemen and Warriors from dying.
- In case any Riflemen, Warriors, and Medics die, use the Second Wind ability right away to revive troops
- Let them destroy many of the splash damage and single-target turrets and Engine Rooms and then repeat this process throughout the rest of the battle. The single-target turrets can be dealt last because they will be swarmed and destroyed quickly.
- Support your troops with Flares, Shock Bombs, Smoke Screens, and Medkits if needed.
How to defend:
- Use splash damage defenses like Rocket Launchers, Shock Launchers, and Mortars. These 3 are effective in killing groups of Riflemen and Warriors, so protect them well.
- Arrange your mines in a good pattern to kill as many troops in 1 or 2 strikes.
- Keep your defenses spread out (not less than 6 tiles) so that a Barrage or Artillery cannot damage/destroy them at once and that one Shock Bomb cannot disable all of them.
Conclusion
The strategy is very effective to use as the troops deal high damage. However, the problem is that these 3 troops have moderate HP. If you have any questions about this, feel free to ask me any questions and I'll give you answers. Also, I'll make other troop guides so feel free to ask me as well.